.png)
The idea behind Customer Portal introduced with memoQ 8.1 is for customers to have a simple and effective way to submit, track, and retrieve translation jobs.
Translation departments in enterprises are sometimes asked to help other departments who need translation. Customer Portal could be used so that their colleagues in other departments can send them documents for translation. Similarly, a translation company could use it so that their customers can send them new translations jobs.
In this blog post, we will introduce the Customer Portal to you and bring you on a quick tour. We will be dealing with other aspects of the customer portal in future posts and webinars.
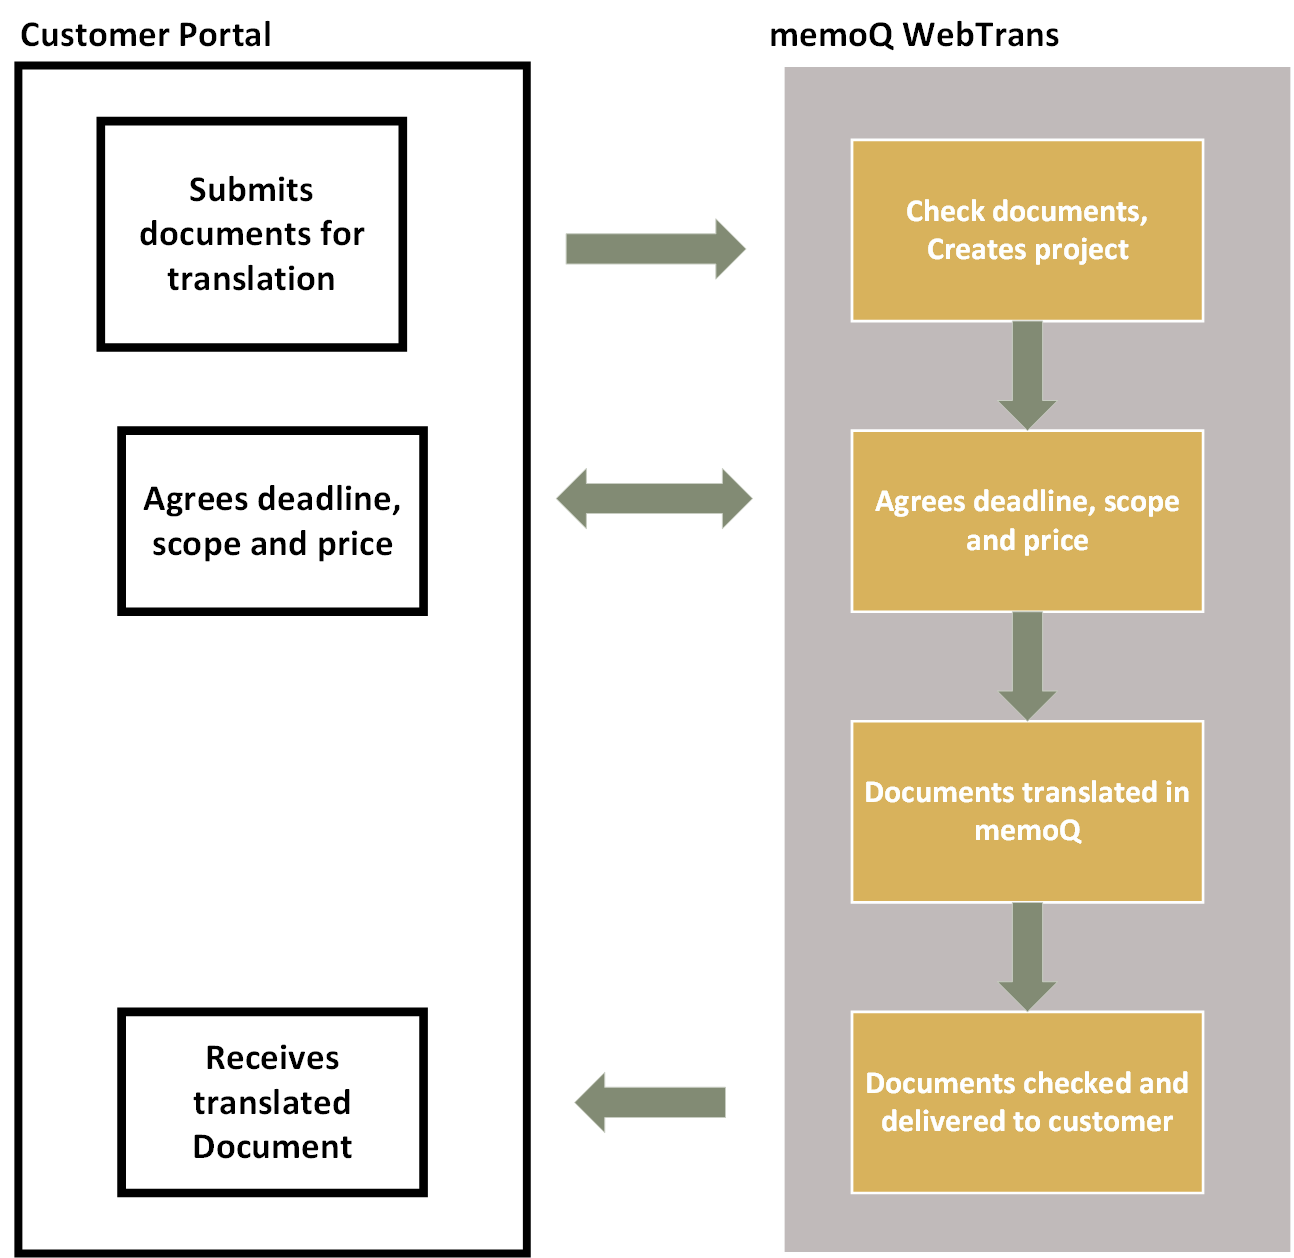
What Customer Portal is all about is making it easier for translation providers and their customers to work together. The diagram below illustrates how this works.
A quick tour
There are four main workflows which are used with the Customer Portal as described in the table below. As you can see the first one is the most manual of the four. However, I have decided to use that as it provides a good vehicle for our tour of the Customer Portal.
|
Project
|
Create memoQ
project, import files |
Analyze files
|
Send quote
to customer |
Customer
accepts quote |
Project Launch
|
|
| PM-create quote |
manual
creation |
PM
|
PM
|
PM
|
Necessary
|
PM
|
| auto creation |
memoQ
|
Auto action
|
PM
|
Necessary
|
PM
|
|
|
Automati
quote |
|
memoQ
|
Auto action
|
memoQ
|
Necessary
|
PM
|
|
Automatic
project |
|
memoQ
|
Auto action
|
memoQ
|
Not necessary
|
memoQ
|
Let us start our tour with a customer having a document which needs translating. They log into the customer portal and select the “Request quote or translation” button.
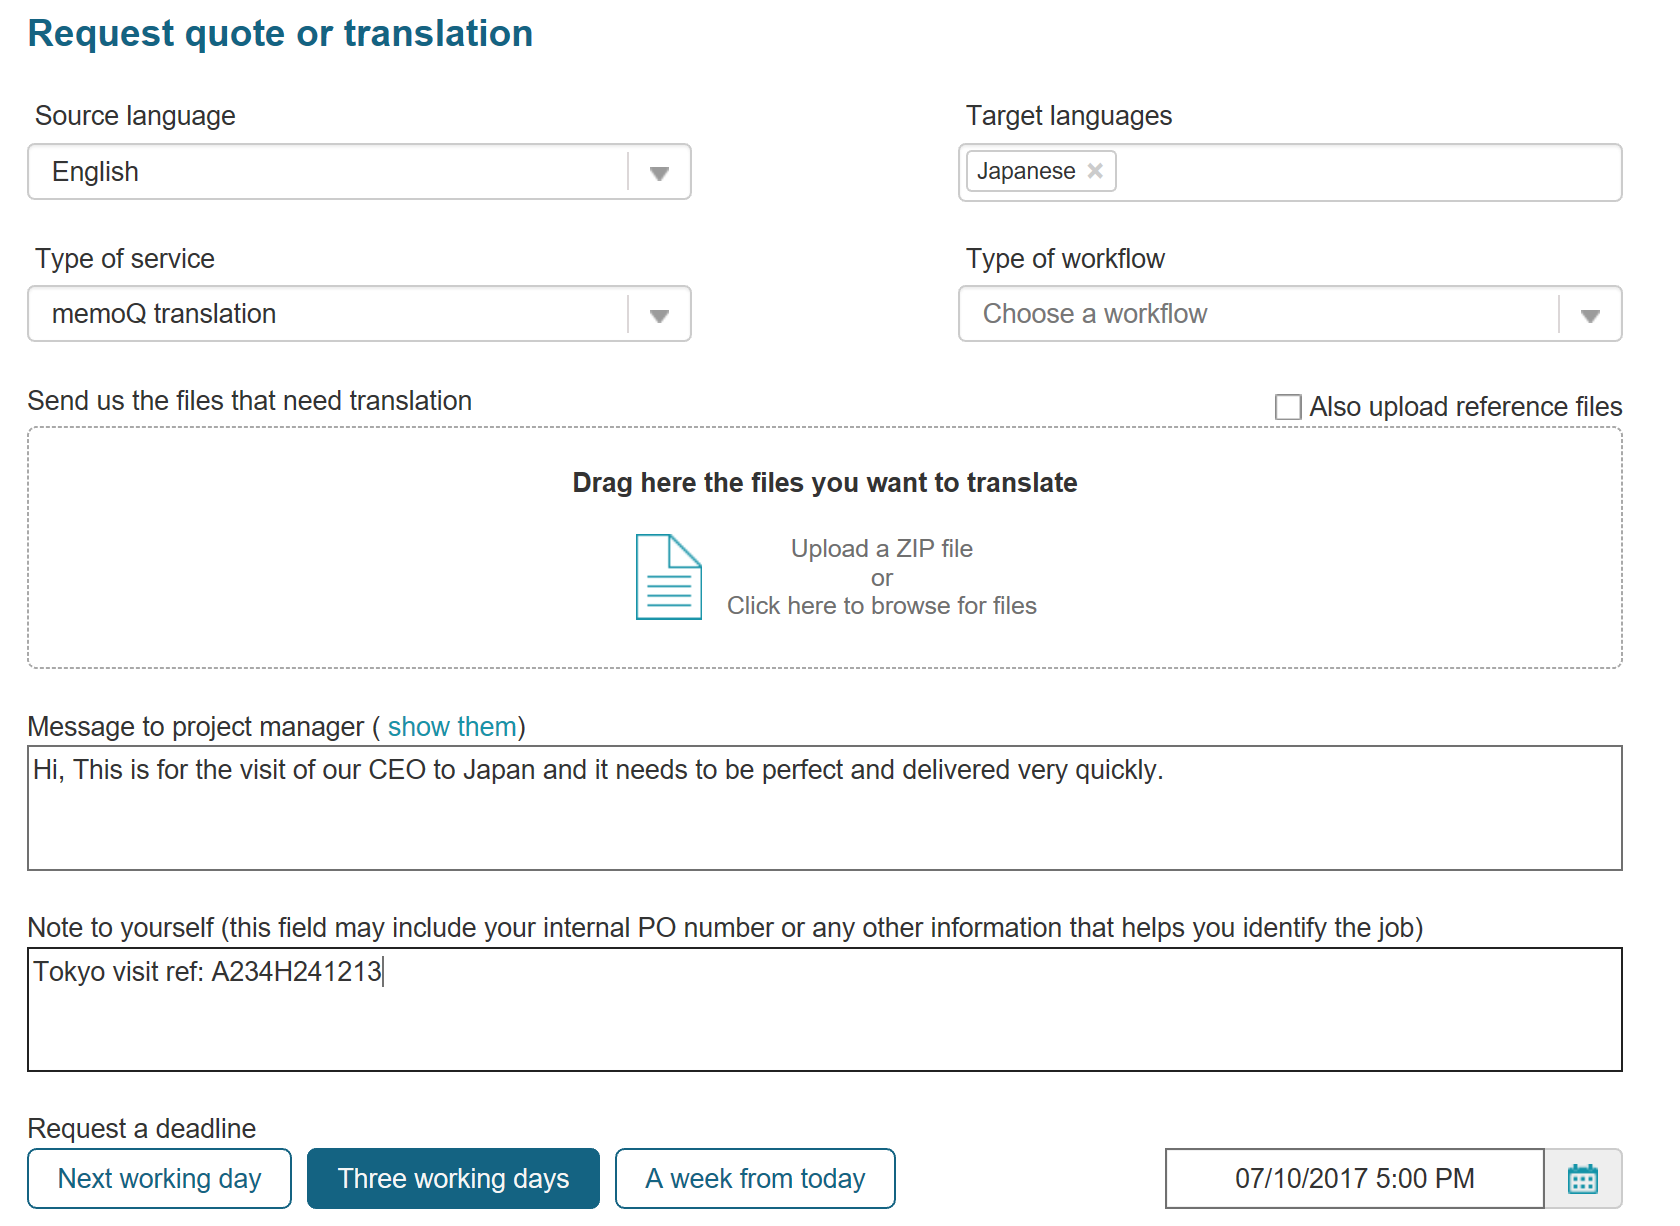
The information needed includes the following:
- Source language
- Target languages
- Type of service
- Type of workflow –This allows the customer to choose a particular workflow from a list which has been set up by the project manager.
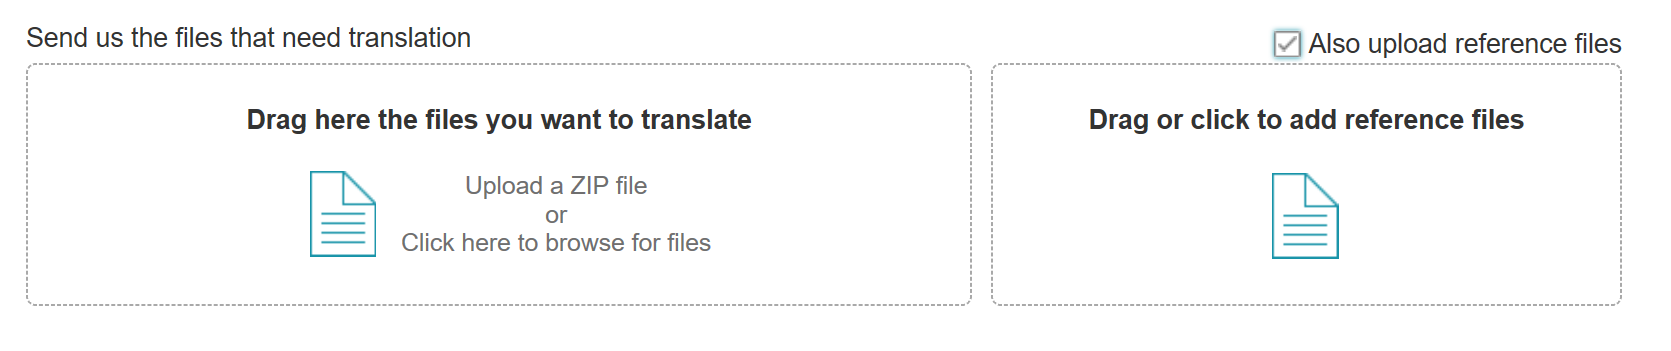
- Files for translation – They customer can also add reference files at the same time. When they select “Also upload reference files” the box for uploading files splits in two, one for uploading translation files and the other for reference files.
- Message to the project manager
- Note to yourself
- Requested deadline
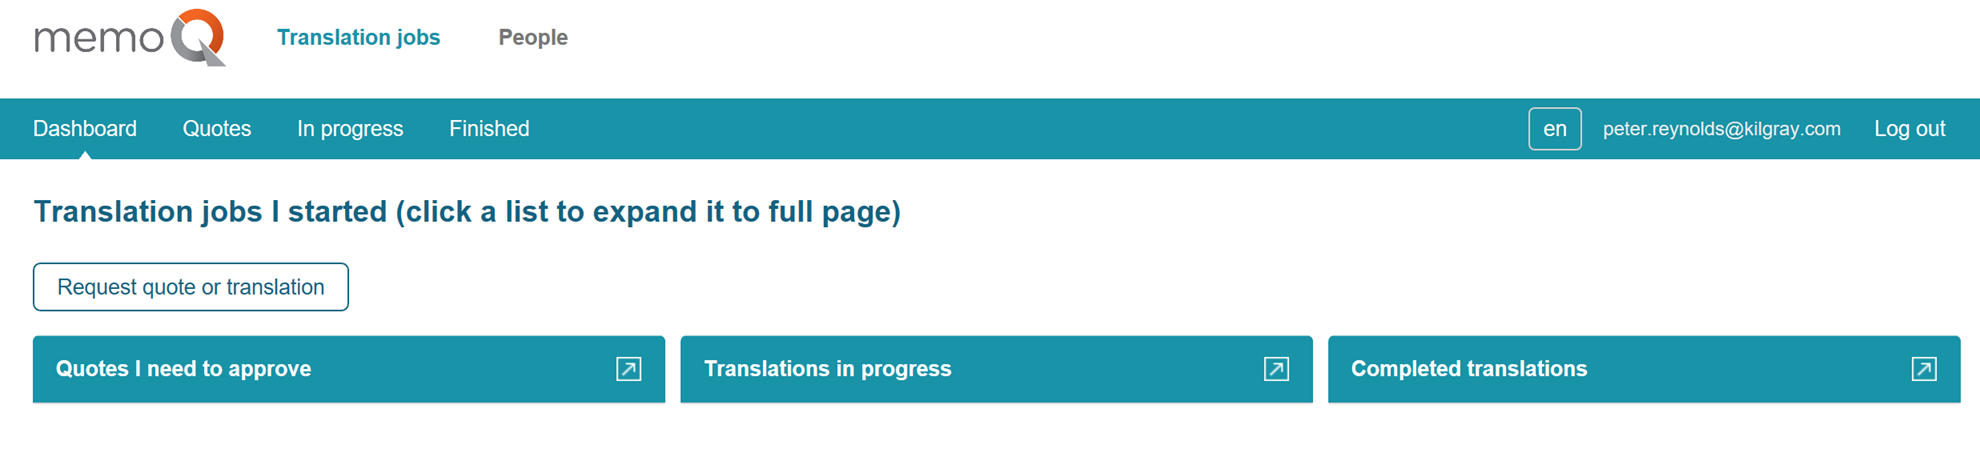
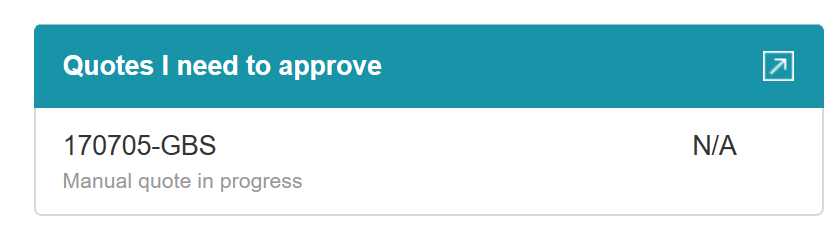
A screen will appear stating that a quote will be prepared. The customer clicks continue. The job now appears below the heading “Quotes I need to approve”.
Note: Only the project manager(s) assigned to this project will see the projects listed in the Quote Request tab.
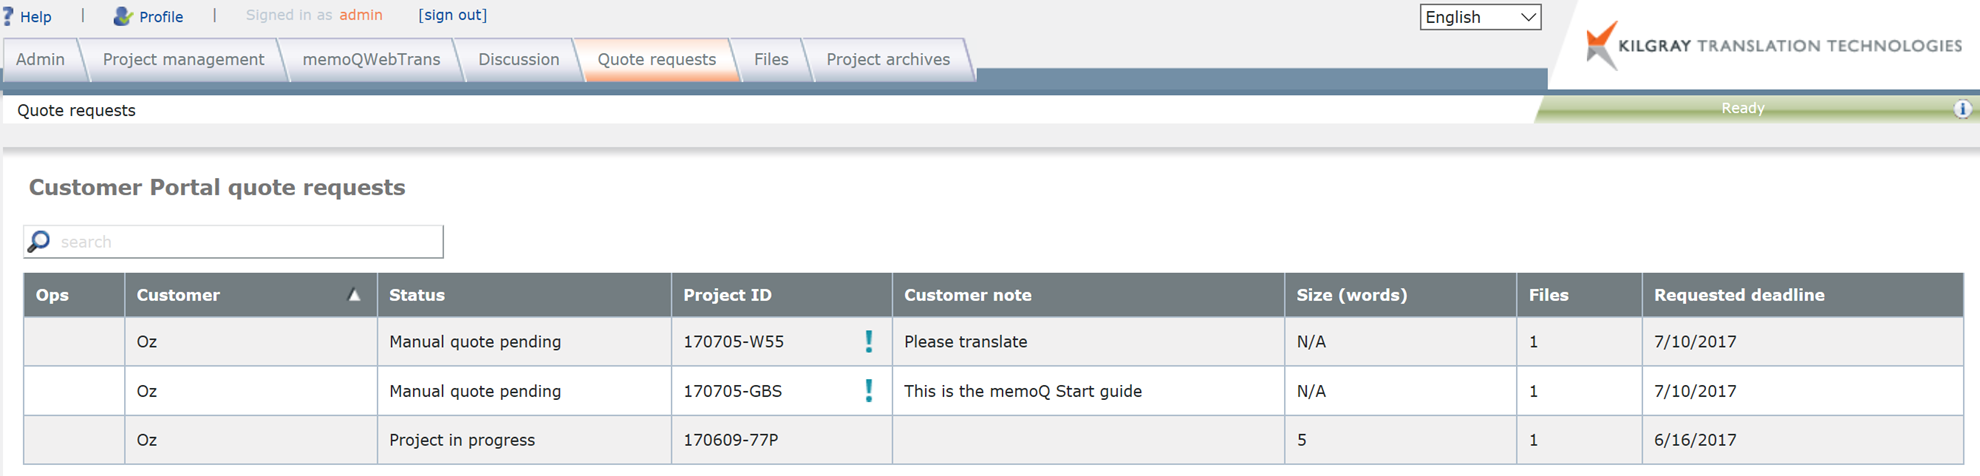
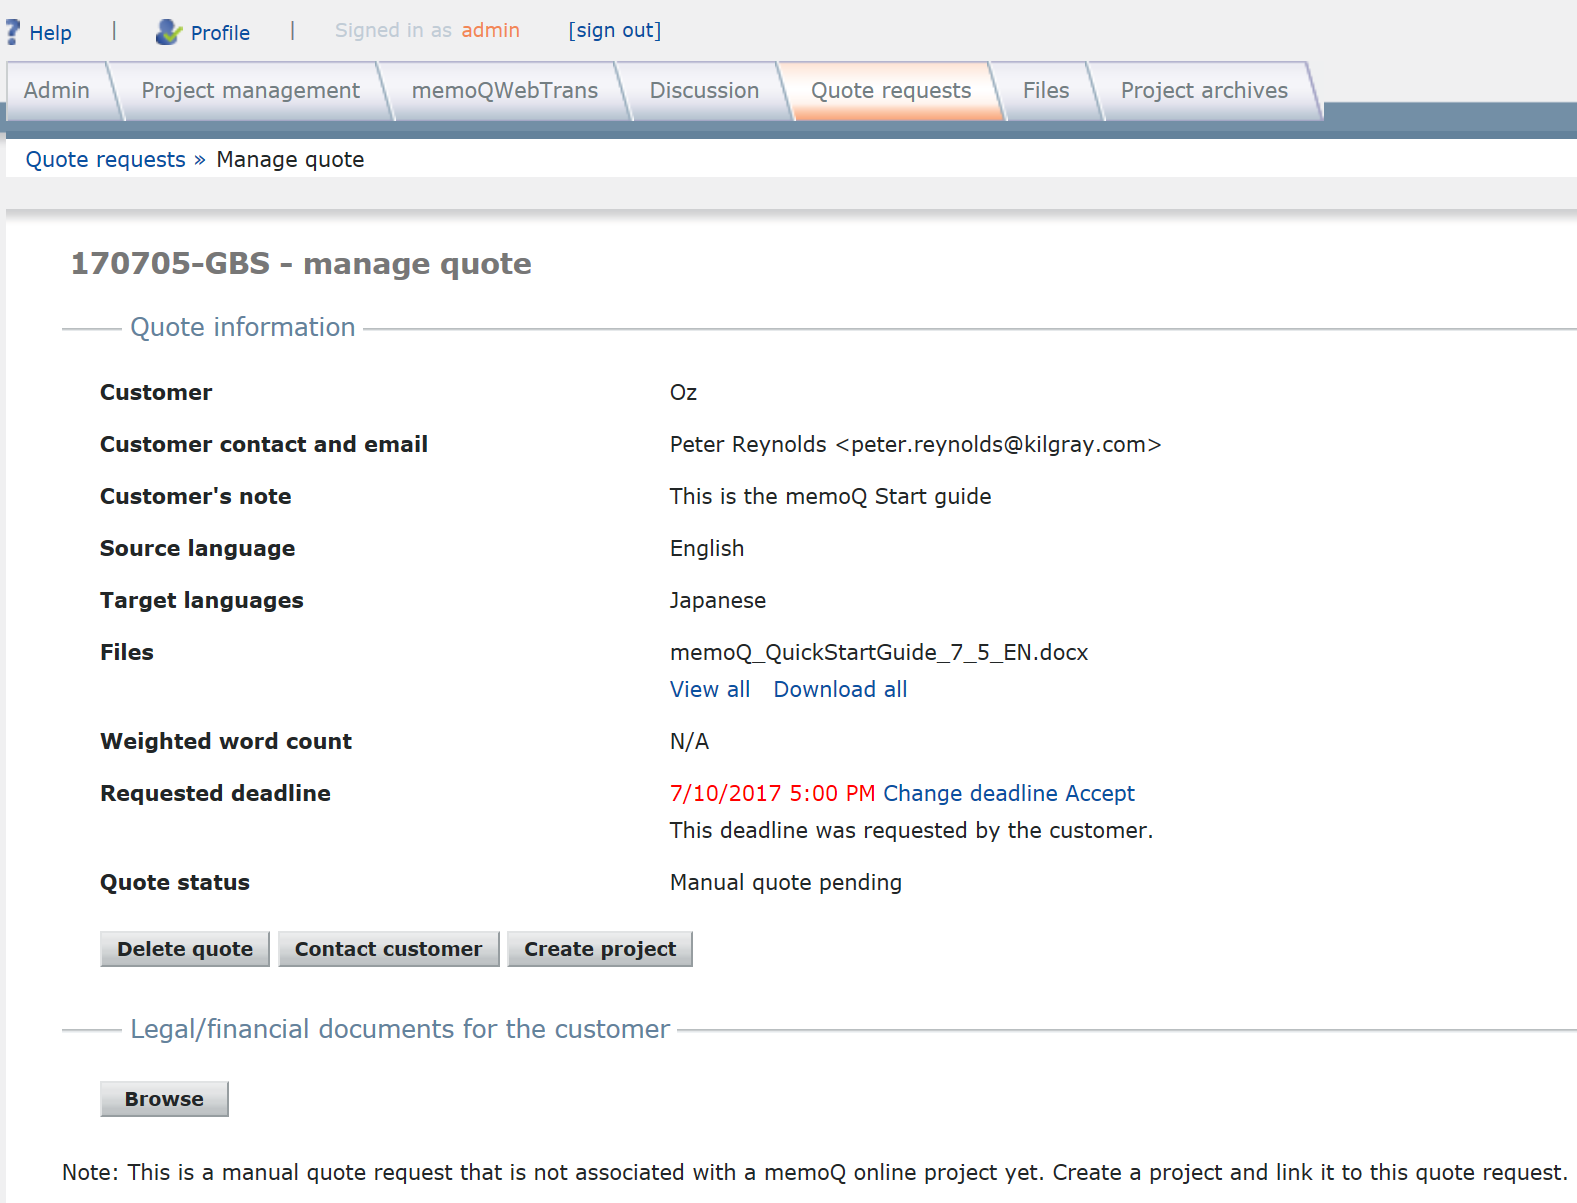
The project manager can also choose to Delete quote, Contact customer or Create project. For our tour, we will select the Create project button. This starts the project creation wizard with most of the details from the Quote request filled in.
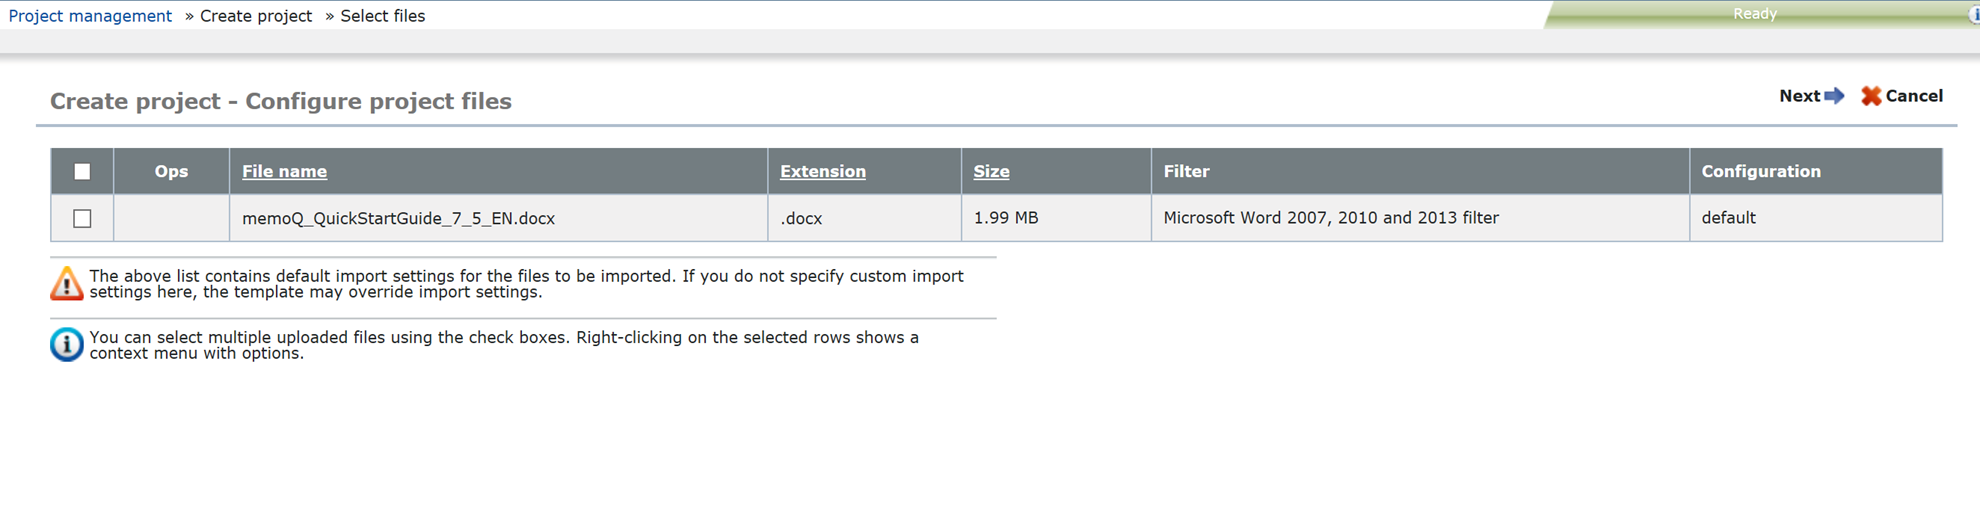
In the next screen, the project manager can choose which Project Template to use and enter other detail as required by the project creation wizard. It is also possible to create the project in the desktop version of memoQ.
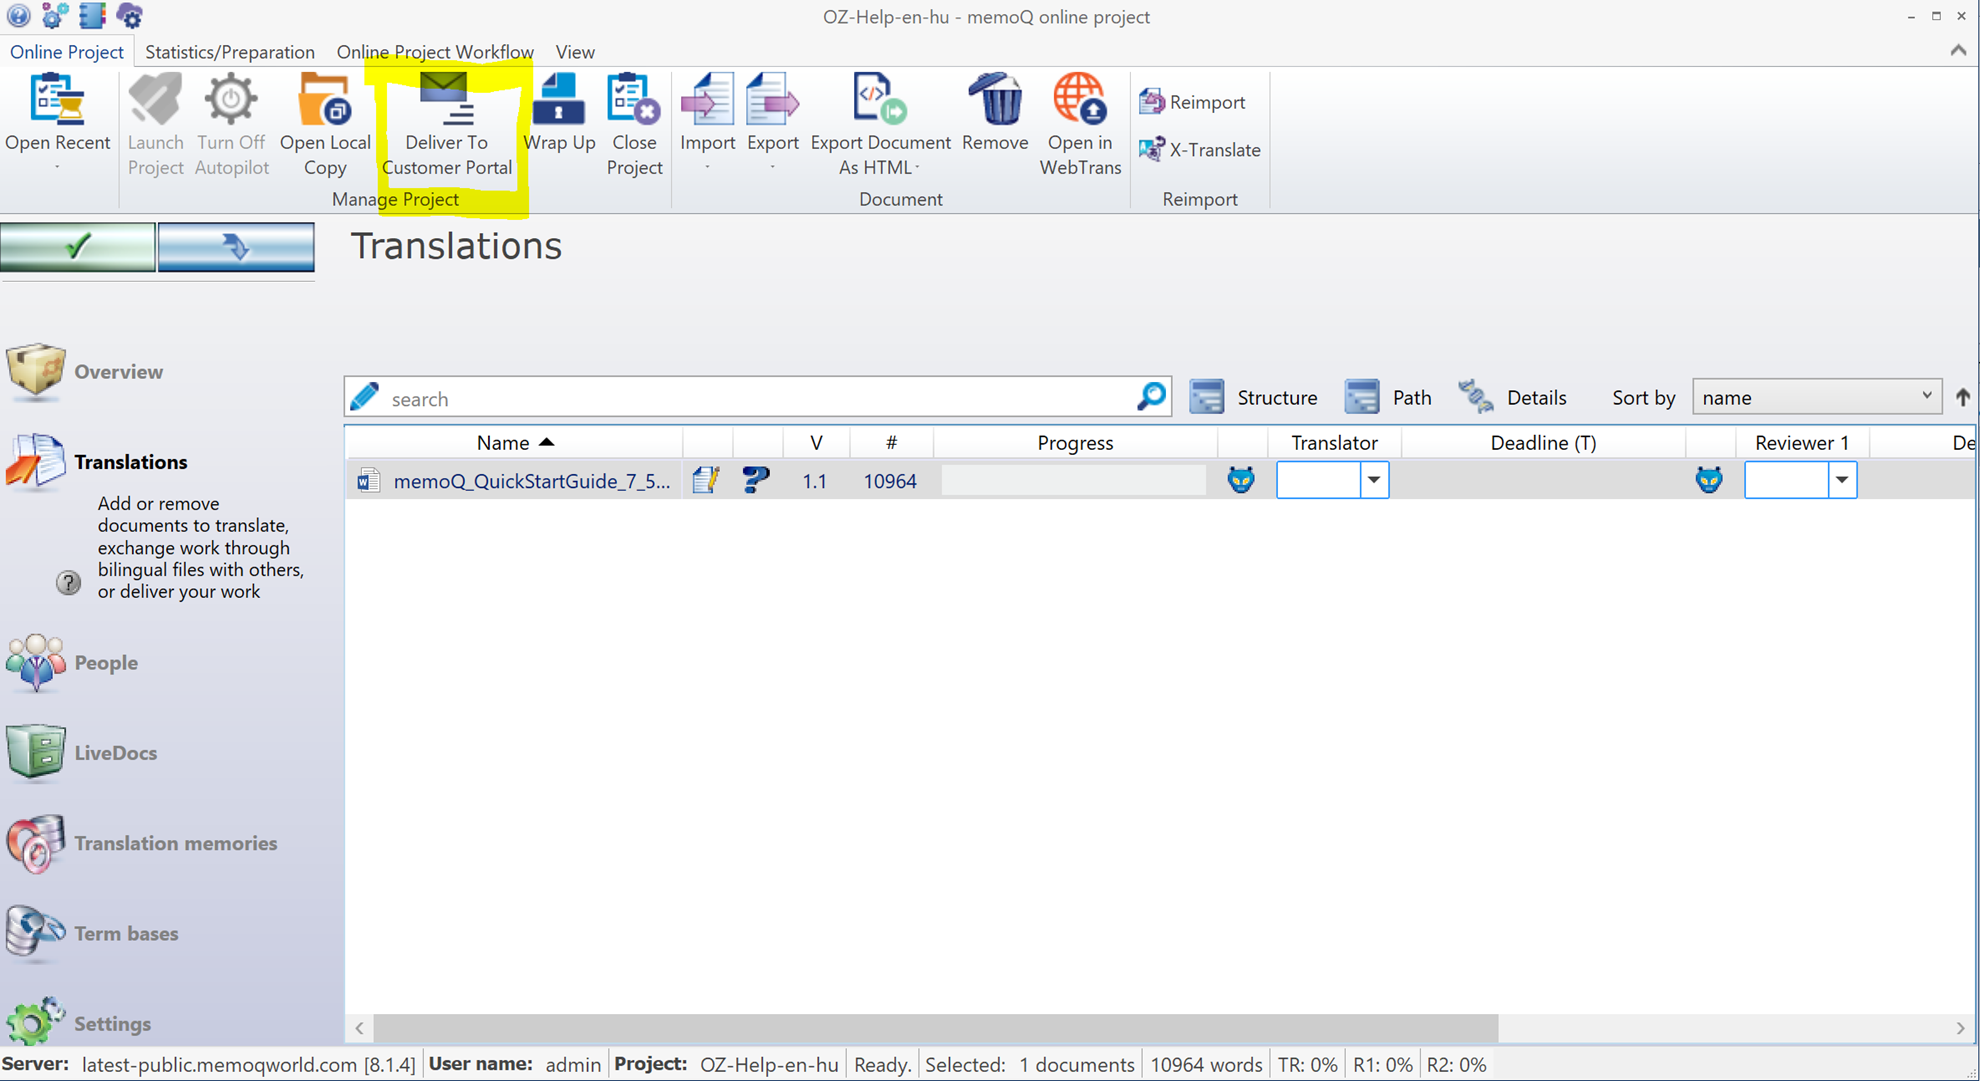
So far, we have shown you the project manager managing this project in memoQ WebTrans but it is possible to deliver the project in the desktop version of memoQ. The screenshot below shows the project for this tour. We delivered the project by clicking the highlighted button ‘Deliver to Customer Portal’.